
The font here is based on techno and the text I am creating is 'la vida' which means to live life in spanish, which is also my facebook name. However, you can also create your own text based on the techniques I use below.
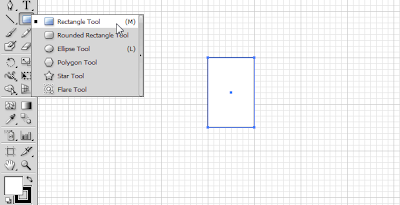 Use the Pen tool, to dot on the points like shown in the red circles, that will create a path for shape editing.
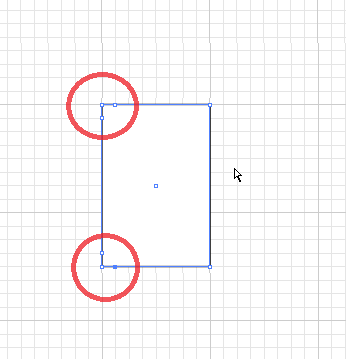 Then, use the direct select tool to bend the point shown in the figure below.
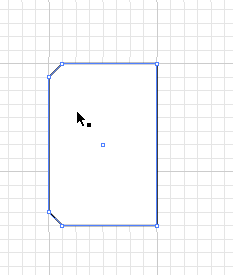 Then, select the upper part of the rectangle, and delete it, the result should be the same as figure below.
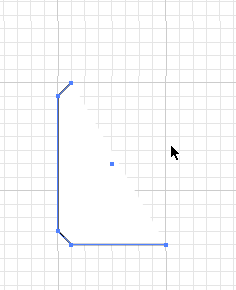 Now, make another rectangle beside the L rectangle and use the Pen Tool to dot the edges for the alphabet A.
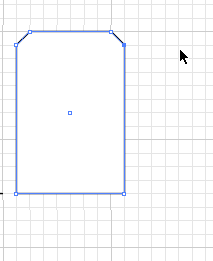 For the V.
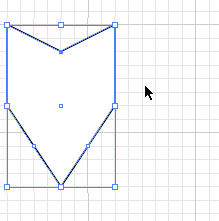 For I.
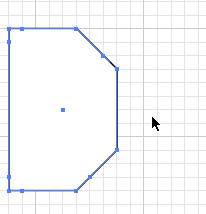
 For D.
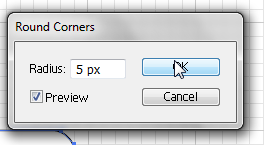
 After creating all the individual texts, select all of them and go to effect>stylize>round corners. Make sure the stroke size for all the objects in Illustrator is zero.
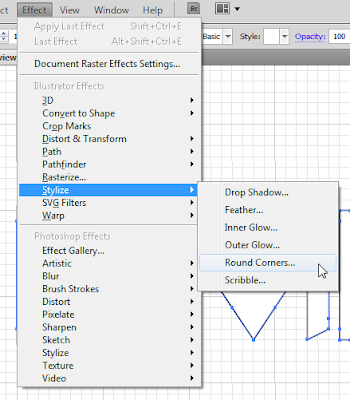 I chose to use 5 pixels, as it is adequate.
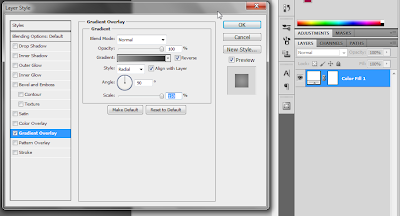
 Then, open up Photoshop and make a layer with gradient settings (or whatever you like) shown in figure below.
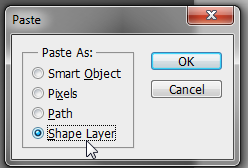
 Select all the objects in Illustrator and copy paste them into photoshop, with the paste settings shown in figure.
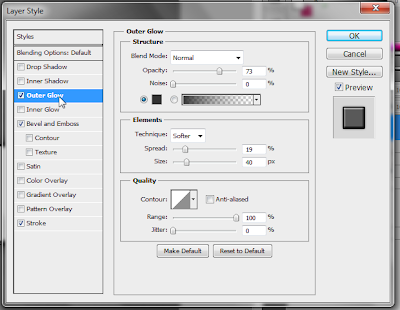
 Here are some of the styles for the 'Shape Layer', however you can do whatever you like to the 'Shape'.
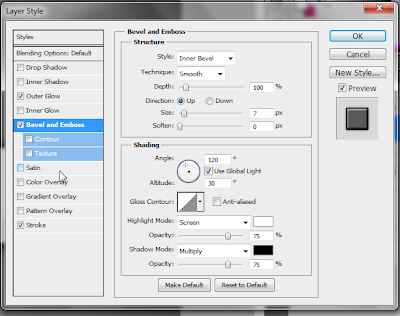
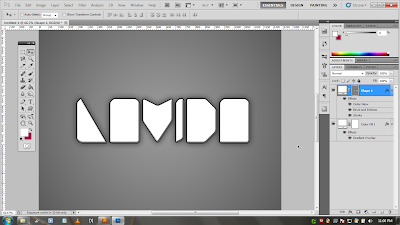
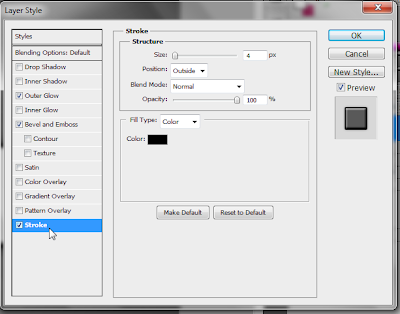 The end result.
First, open up a new document in Illustrator and go to view>snap to grip and show grid.
 Use the Pen tool, to dot on the points like shown in the red circles, that will create a path for shape editing.
 Then, use the direct select tool to bend the point shown in the figure below.
 Then, select the upper part of the rectangle, and delete it, the result should be the same as figure below.
 Now, make another rectangle beside the L rectangle and use the Pen Tool to dot the edges for the alphabet A.
 For the V.
 For I.
 For D.
 After creating all the individual texts, select all of them and go to effect>stylize>round corners. Make sure the stroke size for all the objects in Illustrator is zero.
 I chose to use 5 pixels, as it is adequate.
 Then, open up Photoshop and make a layer with gradient settings (or whatever you like) shown in figure below.
 Select all the objects in Illustrator and copy paste them into photoshop, with the paste settings shown in figure.
 Here are some of the styles for the 'Shape Layer', however you can do whatever you like to the 'Shape'.

 The end result.
So there you have it, a quick way to create a simple yet stylish font.


0 comments:
Post a Comment